

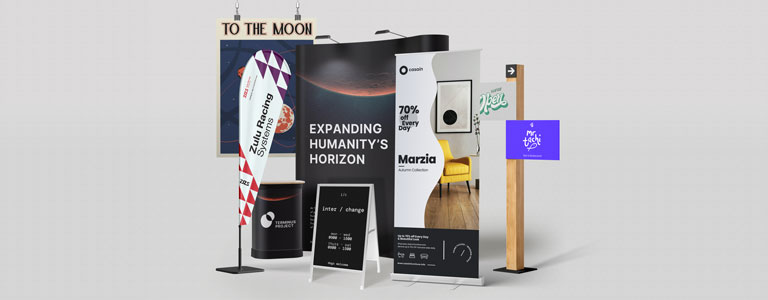
Large-Format Artwork Guide
New to large-format print? This guide covers the artwork requirements for our large-format range, including bleed, safety areas, resolution and file setup.
Always use the template provided for your chosen product. Templates show the correct finished size, bleed, safety area and any product-specific guides.
General Artwork Requirements
• Set artwork up at the correct finished size.
• Use the bleed and safety area specified for the product.
• Keep all important text, logos and imagery inside the safety area.
• Extend background colours and images through the bleed area to prevent white edges after trimming.
• Supply artwork in CMYK Coated FOGRA39.
• Export as PDF/X-1a:2001 or high-resolution JPEG, unless the product instructions state otherwise.
• In Adobe software, the safety area is usually referred to as the margin.
Product Specifications
| Product | Resolution | Bleed | Safety Area |
| Roller Banners | 300dpi | 3mm | 3mm |
| Light Boxes | 300dpi | 30mm | 30mm |
| Stretch Fabric Tube Banners | 150dpi | 30mm | 40mm |
| Fabric Display Stands | 150dpi | 30mm | 40mm |
| Exhibition Pop-Ups | 150dpi | 3mm | 3mm |
| Feather and Teardrop Flags | 150dpi | 25mm | 35mm |
| Café Barriers | 300dpi | 3mm | 3mm |
| Outdoor Banners/Building Wraps | 150dpi minimum | 25mm | 36mm Left/Right; 160mm Top/Bottom |
| Heras Fence Covers | 300dpi | 35mm | 36mm |
| Crowd Barrier Covers | 150dpi minimum | 35mm | 25mm |
Start with the highest-quality image available. Enlarging a low-resolution image can make it appear blurry or pixelated.
Product-Specific Guidance
Roller Banners
Use the supplied template and standard specifications above.
Do not add an extra 200mm panel at the bottom of the artwork. We add the section that fits inside the cassette during pre-press.
Light Boxes
Light-box graphics are interchangeable. Once you have the frame, you can order replacement graphics as required.
Stretch Fabric Tube Banners and Fabric Display Stands
Use the supplied template and keep all important content within the 40mm safety area.
Fabric display stands are generally landscape format and are available in straight and curved styles.
Exhibition Pop-Ups
Keep all important artwork within the centre panel. Artwork placed on the outer panels may not be visible from the front.
The template includes panel guides. Do not remove or ignore these while setting up your design.
Feather and Teardrop Flags
Both flag shapes use the same setup requirements but have different finished outlines.
The template and proof include a stitching guide. Artwork in this area will not be cut off, but it may be distorted by stitching. Keep important text and logos clear of this area.
Café Barriers
Use the supplied template. The larger top and bottom safety area allows for the material to wrap and stitch around the café-bar frame.#
Keep all important artwork within the white safe area shown on the template. Extend background colours and patterns to the edge of the grey bleed area.
Crowd Barrier Covers
We offer standard, Met Police, solo, poncho and premium crowd barrier covers.
One side of the template may appear upside down. This is correct: when the cover is fitted to the barrier, both sides will read the right way up.
Heras Fence Covers
Heras fence covers are suitable for construction sites, events and large-scale advertising. They are available with square or angled corners, plus pedestrian and vehicle gate options.
Use the template for the correct format, particularly where the finished shape includes angled corners.
Outdoor Banners and Building Wraps
The 36mm safety area allows for hemming and eyelets. Keep all important content inside this area.
Outdoor banners can be supplied:
• Hemmed only
• Hemmed with eyelets in the corners
• Hemmed with eyelets every 50cm
Building wraps use the same artwork setup as outdoor banners. They are printed on 110gsm air-mesh polyester and can be produced up to 40 metres long.
Uploading and Proofing Your Artwork
1. Place your order online.
2. Open the order in your account area and select Upload Artwork.
3. Upload the file by selecting it from your device or dragging it into the upload area.
4. Wait for the upload to complete.
5. Select Generate Proof.
6. Review the 3D product preview. Use the rotate control, switch to 2D view or download the proof PDF for a closer check.
7. Review any artwork warnings shown in the proofing panel.
When you are happy with the proof, select Approve and Send for Final Check. A Studio Team member will check the job before it moves into production.
If the proof needs changing:
• Select Back to Upload to replace the artwork file.
• Select My Proof Is Wrong to request a manually prepared proof. The completed proof will be sent to the email address registered on the account.
Orders cannot move into production until artwork has been uploaded and approved. Delivery dates are not guaranteed until this process is complete.